Peony Flowering Tulip, Angelique
Quick Overview
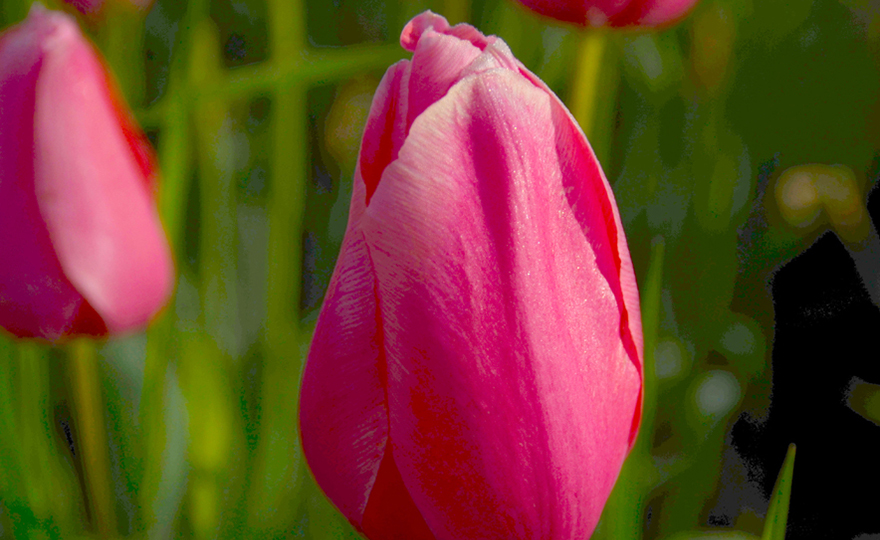
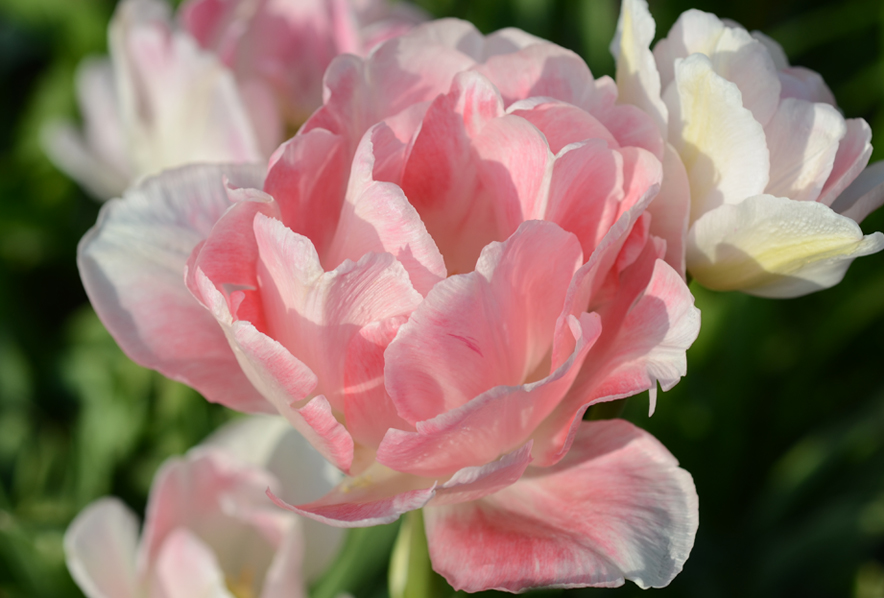
PEONY FLOWERING TULIP – Angelique
Perhaps the most famous of the peony-flowering tulips, Angelique was developed by the famed tulip developer, D. W. Lefeber and introduced in 1959. She is a flawless, fragrant beauty with graceful, double petals of pale rose which are accented with darker pink blushes and pale creamy pink edges. HZ: 3-7 18” Late-season
Peony Flowering Tulip, Angelique
No other flower captures the magic of spring like the Tulip. Wild tulips are indigenous to the parts of the Middle East once occupied by the Ottoman Empire and to Siberia. Sometime between 1100 AD and 1300 AD, the Persians began to cultivate the wild bulbs. Under cultivation, the small, vividly colored flowers were transformed into stately specimens with blossoms in all the striking colors of the rainbow. It was the Dutch that introduced the Europeans to the tulip in 1562. In that year, a Dutch nurseryman established the first tulip nursery. Today, according to The International Register published by The Royal General Bulbgrowers’ Association in the Netherlands, there are more than 5500 tulip varieties.
Perhaps the most famous and astonishing event in the history of the tulip occurred in the 3 years from 1634-1637. This period in tulip history is known as “The Tulipmania”. A frenzy developed around tulip bulbs and throughout Europe, the rich, the middle class and the working class attempted to purchase whatever tulips were available. One tulip, in particular, a red and white striped variety named Semper Augustus became so valuable that a single bulb was commanding a price the equivalent of 15 years’ wages for an average worker. As quickly as it started, “The Tulipmania” ended.
Tulips reached the New World with the first Dutch colonists who settled in what is now Manhattan and coastal New York State in 1624. The Tulip has captured the imagination of the world for nearly a millennia. It has built economies, inspired artists and brought joy and pleasure to the everyman. Along with the rose, it is truly the “World’s Flower”.
Peony flowering tulips have been known for more than a century. They are also known as Double Late tulips and are prized by many for their long lasting, voluptuous blossoms. Angelique is now more than 60 years old and is as popular as it ever has been.
Planting Bulbs in the Fall for Glorious Spring Color
Bulbs are some of the easiest plants to grow. Fundamentally the process requires four steps.
1. Dig a hole.
2. Dust the hole with bonemeal.
3. Place the bulb in the hole.
4. Fill the hole with soil.
There are, however, some additional refinements which help produce even more lavish results and enhance protection from critters.
First, bulbs can and should be planted deeper than the instructions you receive on the package labels. An easy way to remember how deep to plant the bulb is to think of a quarter. If the bulb you are planting has the same diameter as a quarter or less, plant the bulb 4 inches deep. If the bulb is broader than a quarter, plant it 6-10 inches deep. Large bulbs like some alliums, camassias, standard tulips and fritillaries can easily be planted 10 inches deep. As the soil compacts days, weeks and months after planting, it produces a thinner layer of soil on top of the bulb. Planting bulbs deep helps with critter control. Moles, voles, chipmunks and squirrels are lazy little creatures, and they don’t like doing a lot of digging to reach their food.
Second, bonemeal is a must. It is an excellent source of calcium and phosphorus which help the bulbs to form a strong root system and healthy stems. For large bulbs (those bigger than a quarter), use ¼ cup per bulb. For small bulbs, dust the entire surface or hole where the bulbs will reside.
Third, small bulbs should be planted in clusters of 10 or more – 1 inch apart. Large bulbs, like allium, can stand along, but create a much more pleasing presence in the garden when planted is clusters of 3-5. They should be separated by no more than 4-6 inches.
Fourth, bulbs usually multiply fairly quickly and once crowded will not produce blossoms. Plan to divide your bulbs in mid-summer to fall when the top growth has dried out.
These simple, easy, quick tasks are all that is required to produce a lovely bulb display year after year.
Planting Bulbs in Containers
If you live in Hardiness Zones 5 and higher all you need to do is mix some soil. . Check out the soil mix described in detail in our Harvesting History YouTube video. Do not use prepared soil mixes.
The Best Soil Mix for Containers
Always plant bulbs more densely in containers than in the ground. Pots as small as 6-inches in diameter can have a showy presence on a deck, porch or patio. You can use much larger pots and plant several kinds of bulbs.
Fill the pot half full, dust the soil surface with bonemeal, arrange the bulbs on top of the bone meal and fill the pot with the rest of the soil. Dust the surface of the soil with more bonemeal. Water thoroughly, but do not let the pot stand in a saucer of water.
If you live in Hardiness Zones 1-4, you must protect the pots by bringing them into an unheated garage or surrounding them with bales of straw. If you do not do this, the bulbs usually freeze and turn to mush.